Tom Goddard
December 6, 2013
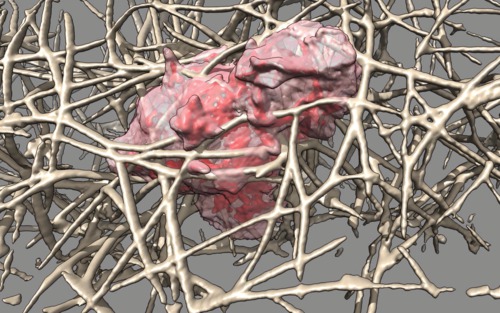
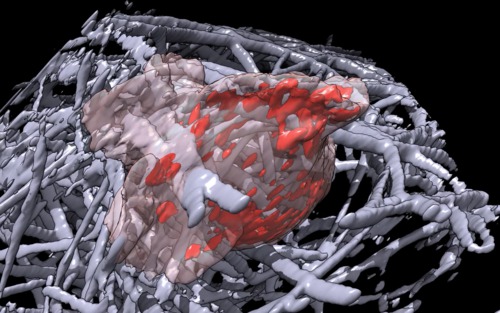
Here are some movies made from 3-dimensional time series of HL60 cells (macrophage-like) moving through a collagen matrix. The four data sets are from Lillian Fritz-Laylin in Dyche Mullin's lab at UCSF.
|
|
|
|
| Cell 6, 5-times faster than real-time, with frames aligned and about 7 interpolated frames between every two original frames, and hide dust (smaller than 1 micron). Movie. | Cell 6, seen from opposite side. Movie. | Cell 6, 10-times faster than real-time, 7 frames/second, no interpolation or alignment. Plays forward than backward. Movie. |
| 
|
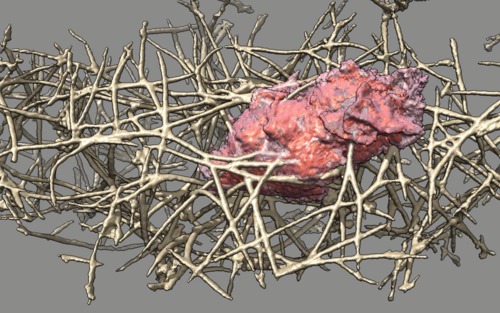
| Cell 7, 35-times faster than real-time, with frames aligned. Movie. | Cell 7, different view point showing cell pass through collagen at end. Movie. |
| 
|
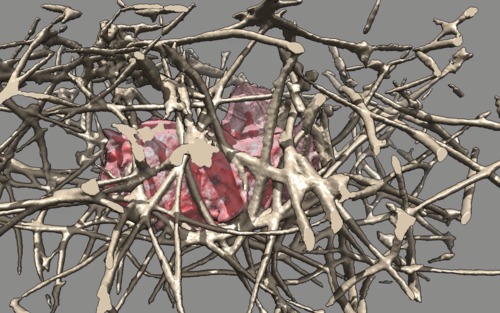
| Cell 8, 35-times faster than real-time, with frames aligned, collagen shown as black mesh. Movie. | Cell 8, collagen shown as white mesh. Movie. |

|
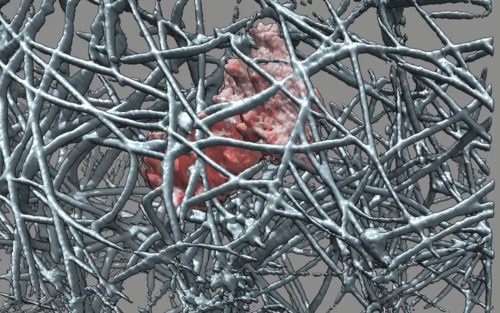
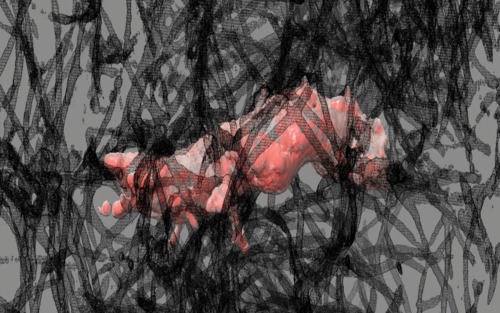
| Cell 10, 10-times faster than real-time, with frames aligned, collagen shown as gray scale. Movie. |
The most interesting thing I saw was that the cells may sometimes go around both sides of a collagen fiber, joining after the go around. Basically they might pass right through a fiber. Mostly the cells did not use this trick, but the cell 7 "different view point" movie shows the best case I saw.
Often the cells reach out with fans and touch the collagen and then retract from them. The movies don't give a clear view of the size of the holes in the collagen net that the cell passes through, and the size of the holes the cell does not pass through. The collagen fibers near the cell move much more than those far from the cell.
These movies were made using either the "vseries play" command or the "vop morph" command. The latter command allows interpolating density maps to give an impression of smoother motion.
Here's an example of the command sequence used to record the cell 10 movie.
  vop morph #20-149 frames 535 playStep 0.001869 interp false model #300
  vop morph #170-299 frames 535 playStep 0.001869 interp false model #301
  movie record super 3
  wait 535
  movie encode ~/Desktop/cell10_morph.mp4 framerate 30 quality high
And here is an example of movie recording using vseries play.
  vseries play #0,134
  movie record super 3
  wait 134
  vseries stop #0,134
  movie encode ~/Desktop/cell8_mesh.mp4 quality high
I improved the Chimera image reader to handle the signed 16-bit TIFF images of the deconvolved cell data. The TIFF image reader comes from the Python Image Library and is very slow, so my first step was to open the full channel 0 (collagen) time series with the Volume Series dialog Open... button, then I saved the data in a single Chimera map (.cmap, HDF5) file using the vseries command. For example,
vseries save #0 ~/Desktop/cell10_ch0.cmap
I saved channel 1 (actin) in the same way. Then I used these two cmap files which open and load much faster than the TIFF files and contain exactly the same data.
The deconvolved data appears to have every frame shifted and scaled so that the minimum value is 0 and maximum is 4095. This makes the brightness jump from one frame to the next. The original data without deconvolution does not have this problem. As a crude attempt to fix the scaling so it is consistent from frame to frame I shifted the mean to 0 and rescaled so that a fixed threshold level (100) had a specified enclosed volume (e.g. 2000 microns**3). This processing is done with enhancements I made to the vseries command. Also I added to the Chimera "volume" command an option "encloseVolume" (and fastEncloseVolume) to determine the contour level that encloses a specified volume.
The original and deconvolved data also jitters moving erratically by fractions of a micron from one time step to the next. To compensate this jitter I aligned each collagen map to the previous collagen map in the time series. I did this with an enhancement to the "vseries save" command (the new "align" option). I copied the collagen alignment to the actin (cell-body). The 10x speed cell 6 movie shows an example where alignment was not done. Here are examples of commands used to process cell 8 data.
  vseries save #0 ~/Desktop/cell8_ch10_align.cmap value float32 zeroMean true fastenclose 2000 normalize 100 align true
  matrixcopy #0-149 #150-299
  vseries save #150 ~/Desktop/cell10_ch1_align.cmap value float32 zeroMean true fastenclose 500 normalize 100 ongrid #0
The data intensity falls off substantially at the edges of the imaged box. When making movies using a surface at constant intensity level (i.e. a contour surface) there are many small surface specks that appear and disappear, especially near the edges. To hide those I used the Chimera "Hide Dust" dialog in some movies to undisplay all connected surface blobs less than 1 micron in size along x, y, and z axes.
Collagen fibers are much fatter in the z-direction then in x,y, likely due to microscope limitations. The deconvolved TIFF files have a bounding box comment tag that indicated the voxel size was about 0.1 microns in x and y and 0.25 microns in z. The collagen fibers were often about 4 pixels in z and about 4 in x and y, making then 2.5 timer fatter in z. So most of the movie view points look along the z axis so the higher x,y resolution features are seen.
$ tiffutil -info cell6_1ch_0000stack_000000msec.tif.deconv.tif
Directory at 0x1bde0
  Image Width: 256 Image Length: 512
  Bits/Sample: 16
  Sample Format: signed integer
  Compression Scheme: Lempel-Ziv & Welch encoding
  Photometric Interpretation: "min-is-black"
  Image Description: "BoundingBox 0 26.52 0 53.144 0 37.5"
  Samples/Pixel: 1
  Number of Strips: 1
  Planar Configuration: Not planar
I used a transparent surface for the actin channel (cell) and another differently colored opaque surface at higher intensity level (appearing inside the transparent surface) to show more detail about the distribution of strong actin signals.
I enabled shadows (Tools / Viewing Controls / Effects) when showing the collagen as a surface. This improves the sense of depth.
I used line thickness 0.3 pixels and supersample 3 when rendering the collagen as mesh to make the lines thinner. This only makes them thinner in the recorded movie as line thickness less than 1 pixel is not supported on the screen. The attempted use of mesh was because two transparent models are not rendered correctly in Chimera -- one always is drawn on top of the other. By using an opaque mesh for the collagen I get an approximation to transparency (screen-door style) and use real transparency for the cell. It doesn't look very good.
I turned down the shininess of surfaces (menu Tools / Viewing Controls / Shininess). The collagen shimmers a lot and having a very shiny surface is distracting. I increased the sharpness to 128 to make the size of the shiny spots very small, and left the reflectivity at 1.
I adjust the dimming with depth (depth cuing, menu Tools / Viewing Controls / Effects) changing start and end to values like 0.4 and 0.6 and moved in the near and far clip planes (menu Favorites / Side View) when showing the collagen as gray scale (solid style rendering). This improves the appearance of depth some. I don't think the grayscale rendering was nearly as clear as the surface renderings.