Mixed Reality Video Recording in ChimeraX
Tom Goddard
November 20, 2019
Here are details on how to record mixed reality videos using ChimeraX.
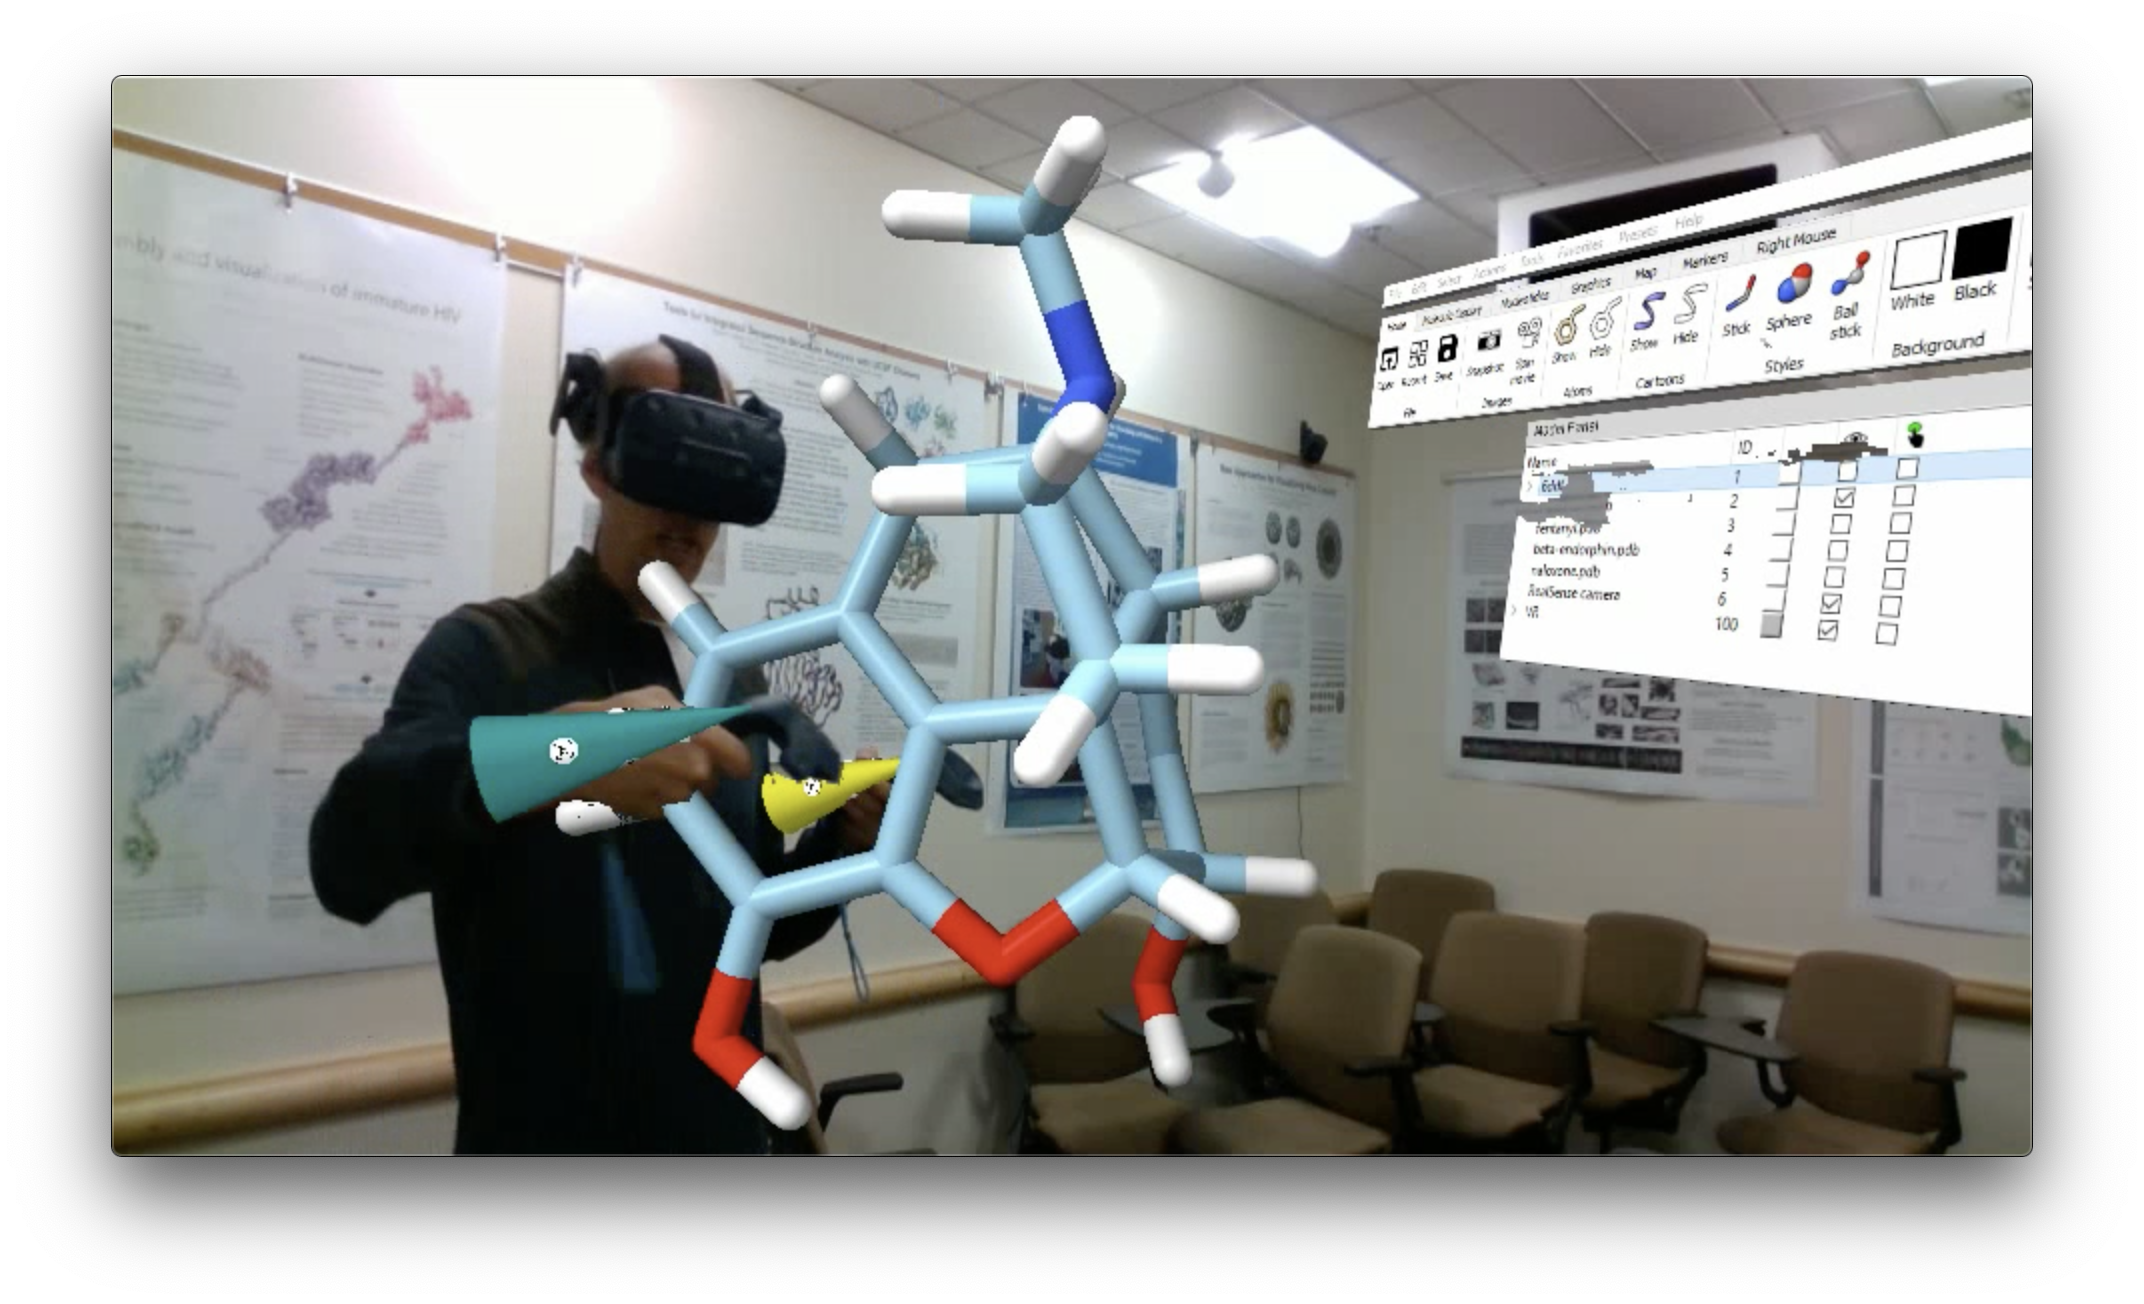
By "mixed reality" I mean combining computer generated molecule models
with video of a presenter and room. Here is an example video
which is also on YouTube.
Why record mixed reality?
It is difficult for someone who has not tried virtual reality to appreciate what it
is like. Videos that capture what the VR user sees in the headset such as these
ChimeraX VR tutorial videos:
hemoglobin,
cryoEM,
opioids,
or tutorials with just images such as
scorpion toxin
give little sense of virtual reality and appear to the user just like normal
3D graphics interactions on a flat desktop display.
Mixed reality show what it is like most clearly. Mixed reality videos are
misleading though since the VR user does not see the room. The videos also
serve as illustration of how a future augmented reality system might work.
Hardware requirements

To blend room video you need a physical camera. In order to know if the presenter
or other objects in the room are in front of or behind the computer rendered objects
like molecules, the physical camera needs to be able to report depth at each pixel.
- Intel RealSense D435 camera ($180). ChimeraX has support for blending video from RealSense cameras only.
- Tripod to mount the depth sensing camera.
- Optional: Vive tracker ($99) to avoid realigning camera every time it is moved. I believe this requires either a Vive, Vive Pro, or Valve Index headset to use the Vive tracker. Also you'll need to make a bracket to attach the tracker to the depth camera as shown in the image at right.
- Virtual reality headset that runs off a PC with SteamVR. For example
Oculus Rift S ($400),
Oculus Rift, Vive, Vive Pro,
Valve Index, Samsung Odyssey, Windows Mixed Reality headsets.
- Fast computer graphics and CPU, we use NVidia GTX 1080 GPU and Intel i7-6700K CPU.
The RealSense D435 uses a USB-C 3.1 Gen 1 connection.
Running VR, depth camera video streaming, and screen capture video recording
simultaneously puts a high load on the GPU and CPU.
- I've only tried this on the Windows 10 operating system.
Starting ChimeraX mixed reality
Blending physical camera video with
ChimeraX VR
requires the following commands to start.
First load some data models then start VR, tell VR to mirror to the screen using
an independent virtual camera, and start streaming from the physical camera.
- Load data files. For example, to open PDB model 6ddf use command
open 6ddf
- Turn on VR (details)
vr on
- Update February 10, 2020.
Setting up the vr room camera is now done by the "realsense on" command in step 4.
Mirror to the desktop display using a fixed room camera
(details).
The following command assumes you are using a Vive tracker and a D435 camera with 69.4 degree color horizontal field of view. Make sure to turn the Vive tracker on by pressing the button on top of it before running this command.
vr roomCamera on fieldOfView 69.4 tracker on
- Stream video from physical camera. The command to enable the RealSense camera requires installing the RealSpace package from the ChimeraX ToolShed using ChimeraX menu Tools / More Tools.... More command options are detailed in the manual.
Update February 10, 2020. The command can now be shortened from "device realsense on" to "realsense on".
Also it will set the ChimeraX window size to match the camera resolution and start the VR room camera.
device realsense on
realsense on
- Align virtual camera with physical camera. The first time you set this up you will need to align the virtual camera to the physical camera and save the alignment as described below.
Aligning the room camera
To get the molecules rendered by ChimeraX and seen in a virtual reality headset
to align with the video from the physical camera you need to align the VR virtual room
camera to match the position of the physical camera. This is pretty difficult.
This is done manually by moving the virtual camera interatively using the VR hand
controllers to make the VR hand cones rendered by ChimeraX overlap with the physical
VR wands shown in the physical camera video. The blended image is shown in VR on
a rectangular billboard and the camera is moved by moving that billboard.
To move the virtual room camera select it by clicking the select check button
in the Model Panel next to the "RealSense camera" model. Then use the move
selected models VR hand controller mode to drag the camera around. To enter this
mode use the Toolbar, click the Right Mouse tab, and click the move selected
icon  with a hand controller button.
Once you have achieved a satisfactory alignment, save the alignment with command
vr room saveTrackerMount true
to remember this relative position between the virtual camera and the Vive Tracker.
If you are not using a Vive Tracker then instead use the command
vr room savePosition true
which will simply remember the absolute position for the virtual camera in the
room. In that case if you move the physical camera or reset the VR tracking bounds
or base stations then you will need to redo the manual alignment.
Tips for achieving good alignment
- First make sure the billboard rectangle is centered at the physical camera.
Grab it with the VR controller at the center and move it until your controller
touches the front of the physical camera.
- Make sure the field of view is set correctly. The RealSense D435 has a 69.4 degree
horizontal field of view, and this is reported in the ChimeraX log when you start
the camera. The virtual camera needs to match that field of view set in the
vr roomCamera
command.
- If you overlap the hand cones exactly with the controllers it looks very bad because
your hands blocking most of the cones. So I like to set the virtual camera slightly
in front of the physical camera (maybe 5 centimeters) so that the cones float in front
of your hands are not blocked by your hands.
Recording videos
To record a video you can simply screen capture the ChimeraX graphics window.
This can be done with the Windows GameBar which is free and comes with Windows 10. I forget
the reasons I found that not so good -- I think it can only capture the whole window
and I would prefer to capture just the graphics panel in the ChimeraX window.
There may be other issues with that free solution such as quality of output video.
I use BlueBerry FlashBack Pro ($59)
for recording, and drag a rectangle around the ChimeraX graphics pane.
Recording tips
-
Match video resolution.
I like to match the ChimeraX graphics window size to the resolution of the RealSense
camera stream.
The RealSense resolution is reported to the ChimeraX log when the
camera is enabled. Currently the ChimeraX code is setting it to 960 x 540 pixels
which is half the RealSense D435 native resolution of 1920 x 1080.
Use this ChimeraX command to set the window size
windowsize 960 540
- Use the VR headset microphone.
In the video recording software make sure you are using the VR headset microphone.
This will give better quality audio.
- Record at slower framerate.
Recording video can use lots of CPU or GPU compressing the video and writing it
to disk. This can make the VR choppy and unusable. One way to improve performance
is to record the video at slower framerate like 10 frames per second. This can
be done with Blueberry FlashBack software.
Technical details
- RealSense video resolution.
The device realsense
ChimeraX command by default requests
960 x 540 pixel resolution at 30 frames per second
from the RealSense camera which is half the native resolution (1920 x 1080)
of the RealSense D435 color camera.
Using half resolution helps the VR run smoother.
The RealSense processing can be time consuming using the CPU and slows the VR
framerate -- the alignment of depth and color RealSense images is especially slow.
- RealSense depth noise.
Noise caused by pixels with no depth value from RealSense camera. Especially
prevalent with uniform color backgrounds (blank walls).
- RealSense Infrared Projector off by default.
Can't use RealSense IR projector because it breaks Vive VR tracking
which also uses IR timing when the basestation IR sweeps cross the hand controller
and headset IR sensors.
- Hand motion lags cone motion.
There is latency in the RealSense camera video. Part of this is that the
ChimeraX RealSense code is by default using only 1 RealSense frame for every
3 graphics frames. This is because the VR runs at 90 frames per second and
the video is at 30 frames per second. But the VR may drop to 45 frames per
second due to inadequate GPU and then the code will only use RealSense frames
sampled 15 per second. I suspect there is also significant fixed latency in
getting color and depth cameras from the RealSense camera but I have not measured it.
- RealSense ChimeraX command documentation.
The ChimeraX device realsense on
command has additional options. The ChimeraX command "usage device realsense" gives the syntax and options or see the
manual for more info.
	  device realsense [enable]
	                   [size 960,540]
	                   [dsize 1280,720]
	  	           [framesPerSecond 30]
	                   [align true]
	                   [denoise true]
	                   [projector false]
	                   [angstromsPerMeter 50]
	                   [skipFrames 2]
	                   [setWindowSize true]
	      enable: true or false
	      - Turn on RealSense camera rendering
The RealSense camera can be enabled without virtual reality. But in that
case the RealSense video is just aligned the ChimeraX camera with a conversion
from room meters to scene Anstroms specified by the command. This is not
a very interesting use except for testing.
- Installing the Python RealSense library
The RealSense package
on the ChimeraX Toolshed provides the device realsense command.
It is not included by default in ChimeraX distributions to avoid increasing the download size
when few users will have this camera. Install it using ChimeraX menu entry Tools / More Tools....
This ChimeraX package uses and includes the the PyPi
pyrealsense2 library from Intel.
That library is currently available on Windows 10 and Linux but not macOS (Nov 27, 2019).